Looking for the blog main page? Click here!

pepper beef stirfry

An easy meal for a busy new mom.  ‘Nuff said!

I’ve doubled the beef and added extra soy sauce as compared to the original recipe, just to ensure I’m getting enough meat protein each day.  I probably add extra pepper too.

stirfry7

Pepper Beef Stirfry

1 Tbsp vegetable oil
1lb ground beef
3 tsp minced garlic
1/2 bag frozen veggies (I use Europe’s Best)
3 Tbsp soy sauce
1 tsp cornstarch
1/2 cup water
1 tsp black pepper (or to taste)

1.  Heat oil in pan and add garlic.  Saute quickly then add ground beef.  Cook until no longer pink.  Drain if desired.stirfry1

2. Throw in frozen vegetables and cook until hot and tender crisp. stirfry2
3.  Add in soy sauce, then make a slurry with cornstarch and water and add.stirfry3
4.  Add in pepper to taste.

stirfry5

Notes:
- I like my ground beef really brown and a little bit ‘crispy-ish’ so I drain it and then fry it a bit more to dry it out.  Make sense?
- The original recipe said you could add a chopped red pepper and cabbage instead of my frozen veggies addition.  Cabbage=gas in infants, so I’m staying away!  Plus frozen is quicker!
- As a side, I picked up some of this individual serving microwave rice packets when they were on sale.  Perfect portions and 1 minute and they’re done!

stirfry4

Other than watching the pan while cooking the ground beef, most of this dish is extremely easy and uses prepared ingredients.  It also makes it easier if your baby’s doing this!:

stirfry6

Bourbon Croissant Bread Pudding

bread pudding 2 

I had a few old croissants lying around and have been watching a lot of Food Network lately, so I was inspired to find something creative to do with them.  I found this recipe for bread pudding that sounded yummy, so I gave it a try.

Emily sat on the couch and watched some more Food Network while I baked.

watching tv

Bourbon Croissant Bread Pudding (from Savory Sweet Life)

INGREDIENTS:

4-5 large croissants, day old preferably
1 1/2 cups  sugar
1/4 cup water
1 1/2 cups heavy cream
1 1/2 cups whole milk
3-4 tablespoons bourbon or rum OR 2 tablespoons vanilla
5 eggs, beaten
1/2 teaspoon table salt

DIRECTIONS:

Tear croissants in half and place in a 9×13 casserole/baking dish.  In a large sauce pan, cook sugar and water on medium high heat stirring occasionally.  While sugar syrup is cooking, combine cream, milk, bourbon and salt in a microwavable container and microwave for 2 minutes (remembering to keep an eye on the sugar syrup).  In another bowl beat 5 eggs, set aside.  Sugar syrup should begin to change colors to a deep amber.  When you see the sides turning amber brown, start stirring.  When the entire syrup turns amber, turn off heat.  Grab a whisk and slowly add heated cream mixture and stir like crazy.  When the cream hits the sugar syrup it will bubble somewhat violently and will try to crystallize.  DO NOT PANIC.. just continue to stir like crazy until your caramel sauce is smooth.  Once sauce is smooth, slowly add egg mixture while stirring everything.  Pour everything over croissants.  Croissants may start to float.  Just press them down making sure every piece gets completely coated with caramel mixture.  Preheat oven to 350 degrees.  Allow the bread pudding to rest while preheating and when your oven is ready bake for 30 minutes.

bread pudding 1 

Notes:
- As you can see, it got a little crispy in the oven.  Everything takes a little longer when you’re working with an infant as an assistant and reading a great birth story like Lucy’s.  You can check out Emily’s birth story here.
- I also didn’t read the directions properly and added the eggs into the cream mixture before microwaving it.  Also Lucy’s fault!
- I didn’t have any bourbon so it just has vanilla.
- For some reason I could not get the sugar syrup to turn amber and it was bubbling like crazy and crystallizing right from the start.  Maybe I should have measured out the water even more carefully?
- I also only had 3 croissants and I tore them up into pieces.  Seriously a bad day for me reading recipes.
- So the recipe was a borderline fail for me.  But it still tasted delicious!


Oh, and what I said about Emily watching the Food Network?  Not true.  Not only are we not ok with planting her in front of the TV as a babysitter, she’s just not interested.

Starting to get a little mad…

tv 2


…and completely disinterested.

tv3 Look at those mad little fists!  And crying without tears – she already knows how to get her mama’s attention when she wants some cuddles and to participate in the action!

Yankee Pot Roast Soup

If you’ve ever been to Montana’s (the restaurant), you may have tried their Yankee Pot Roast Soup.  Craig and I love to enjoy a bowl as an appetizer whenever we visit, and I thought it was a great, hearty fall weather food so I scoped out recipes online.  Would you believe it there is already a recipe online that people have commented and said it tastes like the Montana’s soup?  I made a batch of it tonight, and I have to agree that it is a pretty close taste.  Enjoy!

stew 4

Yankee Pot Roast Soup

Source: Family Oven

1. Sprinkle beef with salt and pepper (I keep kosher salt in a salt pig on my stove for this purpose) then brown in butter over Medium High heat.

stew 1

2.  Add in garlic during last few minutes of browning then add in a small amount of the broth to deglaze the pan. 

3.  Add in additional broth and remaining ingredients and bring to a boil.

stew 2

4.  Reduce to a simmer and cook for around an hour (until potatoes are cooked through).  Check spices and flavourings and modify before serving.

 stew 3

Notes:

- I couldn’t find maggi seasoning in the grocery store, so I found a site online that said I could mix Worcestershire and soy sauce in equal parts to much the same result.

- I left out the celery as I don’t really like cooked celery.

Cauliflower Soup

Today I made some Cauliflower Soup that I can freeze for work lunches. We've been having unseasonably cold weather for July, and it's gotten me into a fall mood a little early I think.

My basic philosophy for soup is that the less you follow the recipe, the better. Much of my cooking inspiration comes from The Joy of Cooking Cookbook (see bookshelf). If there is ever a technique or base for a recipe that I am unsure of, or if I need to use up some veggies in the fridge before they spoil, I know I can always turn to my JCC for enlightment. But again, I don't follow the recipes exactly. What this typically leads to is that I rarely make the same exact thing twice, which lends variety to life; however on occasion it would be nice to know some exact measurements when it turns out just perfectly.

Anyways, back to the soup I made tonight. The recipe that follows is not meant to frustrate you, but instead allow you to adjust the recipe to your own tastes and what you have on hand. It is how I typically make this soup, but certainly is not the "right" way. 
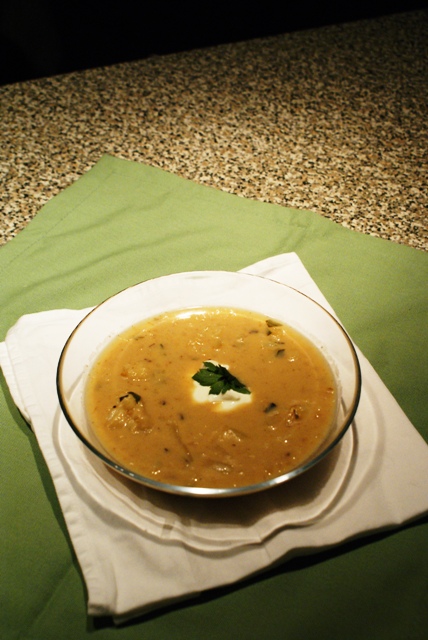
Yummy Cauliflower Soup

Onion, chopped (I use approx. 1/2 an onion)
Carrot, chopped
Parsley Chopped
Vegetables (celery, broccoli, leeks, etc., would all be good additions) Cauliflower, chopped (I used a full head of cauliflower)
Chicken Broth
Butter
Milk
Cream
Flour

In a stock pot, saute onions, carrots and other vegetables in butter, until onions begin to brown. Add in cauliflower and parsley, and with the heat on low, allow all of the veggies to 'sweat'. You'll need to keep the lid on for this and it'll take about 20 minutes. (You can clean up your cutting board and knives while you wait...).

Next add in the chicken broth and bring the whole mixture to a boil, then allow it to simmer for a few minutes while you prepare the roux. I like to melt some butter in a small pot on the stove and then add in 5 or 6 tablespoons of flour (cornstarch in a pinch), stirring constantly. Allow it to brown a bit and then slowly add in a few cups of milk, while stirring. Once this mixture is smooth & hot (it takes some practice to create a good roux and then incorporate the liquids - don't be discouraged if it doesn't work perfectly the first time, and certainly don't throw it out - this soup is beautifully imperfect, and it will all come together in the end).

Next, add a cup or two (depending on your desired creaminess and fat tolerance) of cream to your white sauce and add the whole pot to your simmering soup.

Allow to simmer, stirring occasionally, for about 20 minutes. You're done!

In our house, soup is used for work lunches and our after-church lunch on Sundays (usually with Grilled Cheese - Craig's specialty :). I'll usually dump it all into a large container and put it in the fridge to cool overnight.

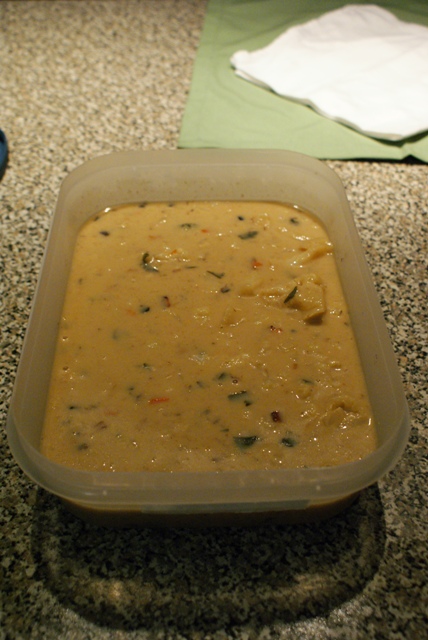
The next day, I'll divide the soup into medium sized zip lock bags, wash & dry the container, and then lay the bags flat inside the container. The whole thing is then thrown into the freezer and once frozen, I can take the soups out of the container and fit them into the spaces in the freezer. They also easily fit into a sandwich sized container, into which I can also fit some crackers or shredded cheese if I'd like. The reason for this whole charade is that I'm very afraid of leakage on the way to work, and as well, things in bags just work a whole lot better when you're trying to make a fridgetop freezer stretch to hold make-ahead meals.
Related Posts with Thumbnails